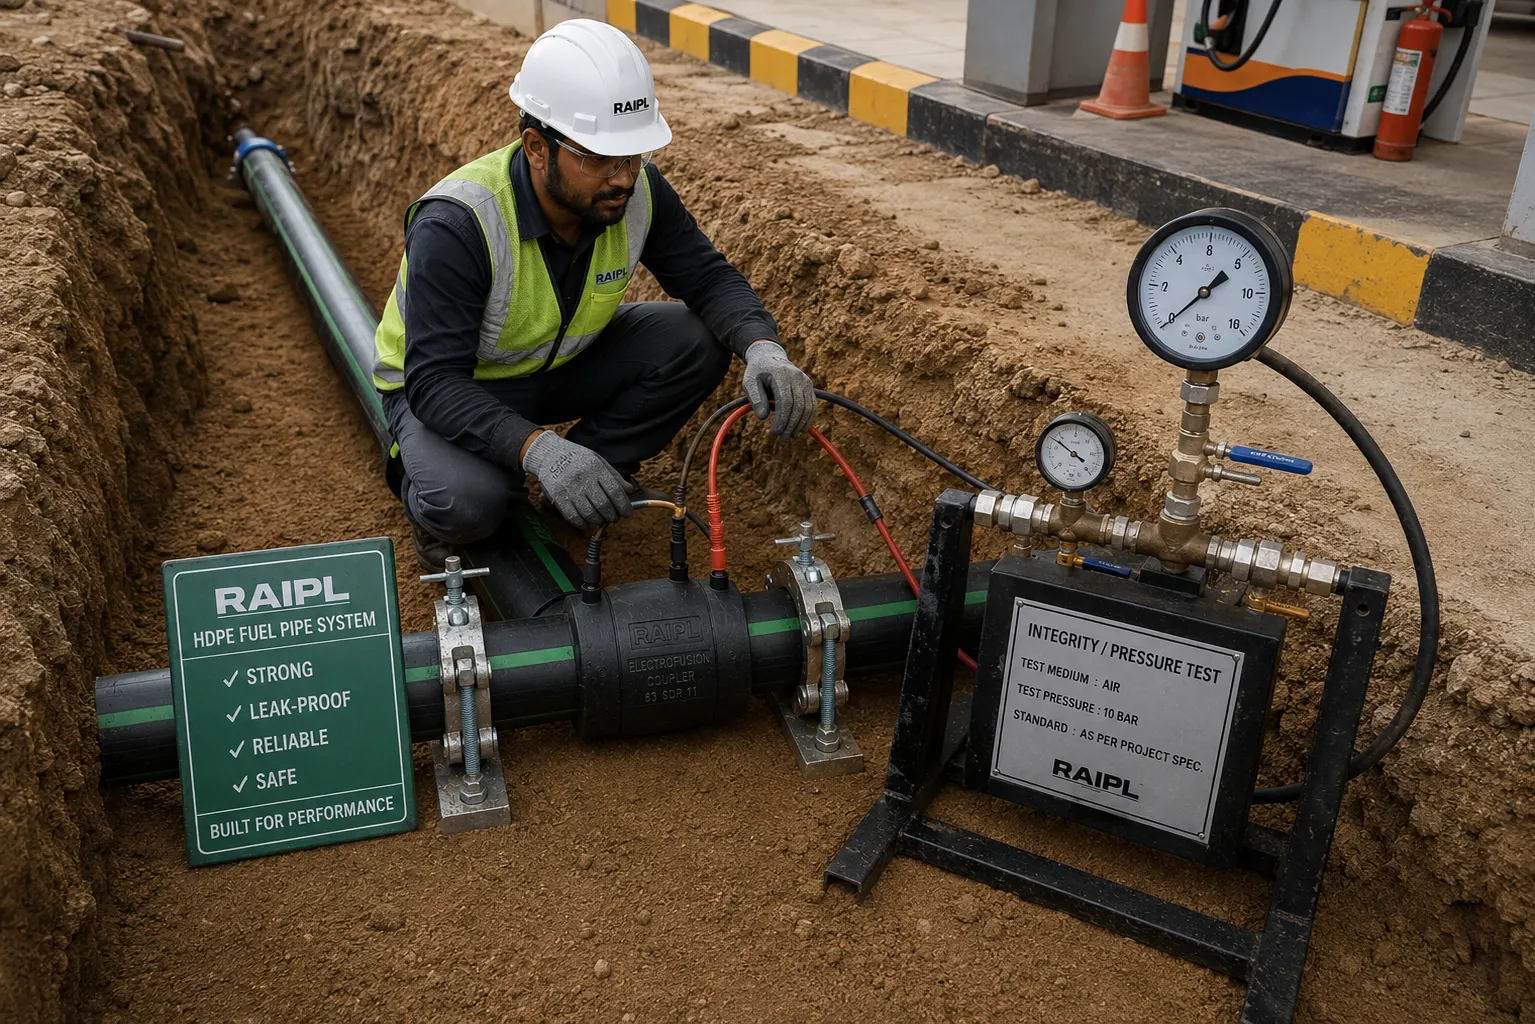
Why Testing Before Commissioning Matters
Once an underground fuel piping system is installed, most of it will eventually be covered by backfill, paving and forecourt construction.
After that point, accessing the pipe becomes much more difficult.
This is why inspection and testing before commissioning are critical steps.
The objective is simple:
Find any installation problem before the piping system disappears underground.
Testing helps confirm that the installed network has been assembled, connected and prepared according to the applicable project and system requirements.
Testing Is About the Complete System
A common mistake is to think only about testing the straight pipe.
But the underground network includes much more than that.
The complete system can contain:
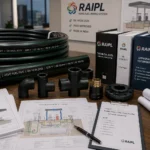
- Multilayer HDPE fuel pipe
- Electrofusion couplers
- 45° elbows
- 90° elbows
- Tees
- Transition fittings
- Flange connections
- Tank-side interfaces
- Dispenser-side interfaces
Every connection becomes part of the installed fuel path.
That is why testing should be viewed at a system level.
Step 1: Visual Inspection
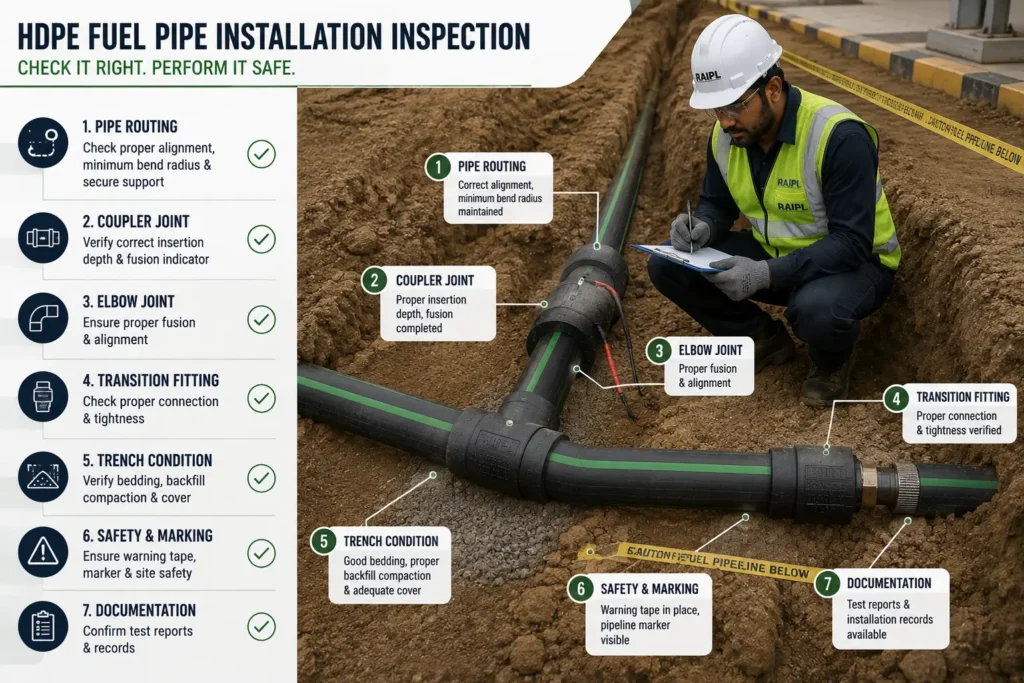
Before any pressure or integrity test is carried out, the installed piping should first be visually inspected.
The inspection can include checking:
- Pipe routing
- Pipe condition
- Joint alignment
- Fitting position
- Bend radius
- Transition connections
- Trench condition
- Support and bedding
- Product identification
- Visible damage
Any obvious installation issue should be corrected before proceeding further.
Step 2: Electrofusion Joint Inspection
Electrofusion joints should be reviewed according to the fitting and system requirements.
Important checks can include:
- Correct pipe insertion
- Proper alignment
- Joint position
- Fusion indicators where applicable
- No visible damage
- Cooling period completed
- Installation records available
Visual checks do not replace formal testing, but they are an important first filter.
A joint that already looks incorrectly aligned should not simply be hidden underground and assumed to be acceptable.
Step 3: Check Product and Fitting Compatibility
Before commissioning, confirm that the components installed on site match the approved system.
This can include:
- Pipe size
- Pipe type
- Fitting type
- Fitting size
- Transition components
- Flange components
- Manufacturer identification
- Batch information where applicable
This is especially important on construction sites where multiple types of piping materials may be present.
The system should not be assembled using unverified components simply because they appear to fit physically.
Step 4: Pressure or Integrity Testing
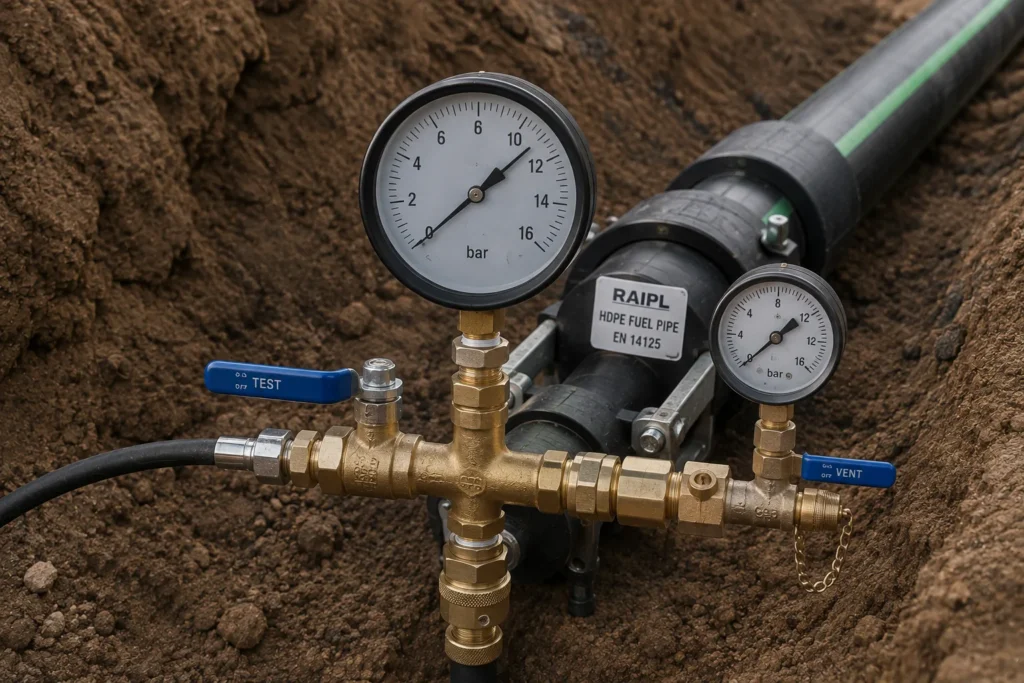
Depending on the piping system, project specification and applicable requirements, the installed fuel line may need to undergo a defined pressure or integrity test.
The exact:
- Test medium
- Test pressure
- Test duration
- Test method
- Acceptance criteria
should come from the applicable approved procedure.
These values should never be guessed on site.
The purpose of the test is to verify the integrity of the installed network under controlled conditions before the system is placed into service.
Why Test Pressure Must Follow the Procedure
A common misunderstanding is:
“If higher pressure is safer, just test at the highest pressure possible.”
That is not the correct approach.
A test should be performed using the pressure defined by the applicable system or project procedure.
Excessive pressure can introduce unnecessary stress.
Insufficient pressure may not provide the required verification.
Testing should therefore follow the specified engineering method rather than an improvised value.
Step 5: Monitor for Pressure Stability
Where pressure testing is part of the approved procedure, the system may need to maintain the specified test condition for a defined period.
During this stage, the test team observes the system according to the prescribed method.
The objective is to identify behaviour that could indicate:
- Leakage
- Incorrect connection
- Joint problem
- Test-equipment issue
- Other system irregularity
Environmental effects and the characteristics of thermoplastic piping also need to be considered according to the relevant test procedure.
This is why trained personnel should interpret the results.
Step 6: Leak Verification
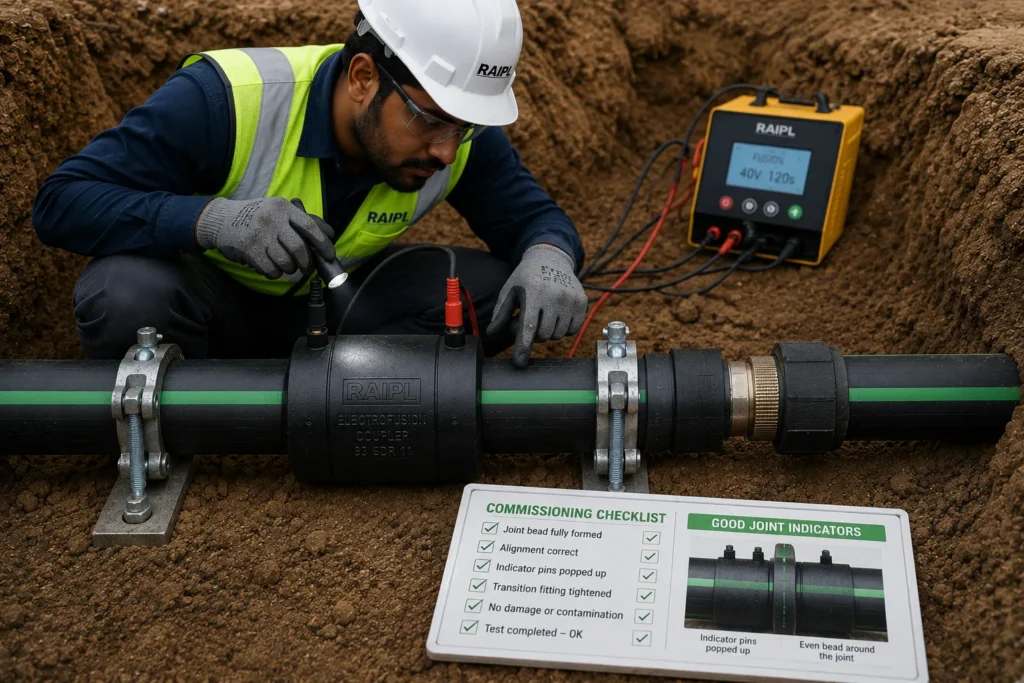
Leak verification is one of the most important commissioning checks in any fuel piping system.
The procedure used depends on the system and project requirements.
Potential inspection areas can include:
- Electrofusion connections
- Transition fittings
- Flange interfaces
- Tank-side connections
- Dispenser-side connections
The objective is to confirm the installed system meets the required integrity criteria before fuel is introduced.
Step 7: Inspect Transition Connections Carefully
Transitions deserve particular attention because they often connect different materials or connection technologies.
Examples include:
- HDPE to threaded connections
- HDPE to flanged connections
- HDPE to metallic components
- Pipe to equipment interfaces
A perfectly installed straight pipe does not guarantee overall system integrity if the transition connection is poorly assembled.
For this reason, the complete fuel route should be inspected from one end to the other.
Step 8: Verify Trench and Pipe Condition Before Backfilling
Before the piping is covered, inspect the physical installation.
Check that the pipe is not resting against:
- Sharp stones
- Construction debris
- Damaging edges
- Incorrect supports
- Unapproved structures
Also confirm that the pipe route matches the intended installation drawing.
The best opportunity to correct a routing problem is while the trench is still open.
Step 9: Record the Test Results
Testing should not exist only in someone’s memory.
Proper project documentation can include:
- Date of test
- Location
- Pipeline identification
- Pipe details
- Fitting details
- Test method
- Test parameters
- Result
- Inspector or technician information
- Relevant observations
Good documentation creates traceability.
This becomes especially useful after the installation is buried.
Step 10: Final Acceptance Before Closure
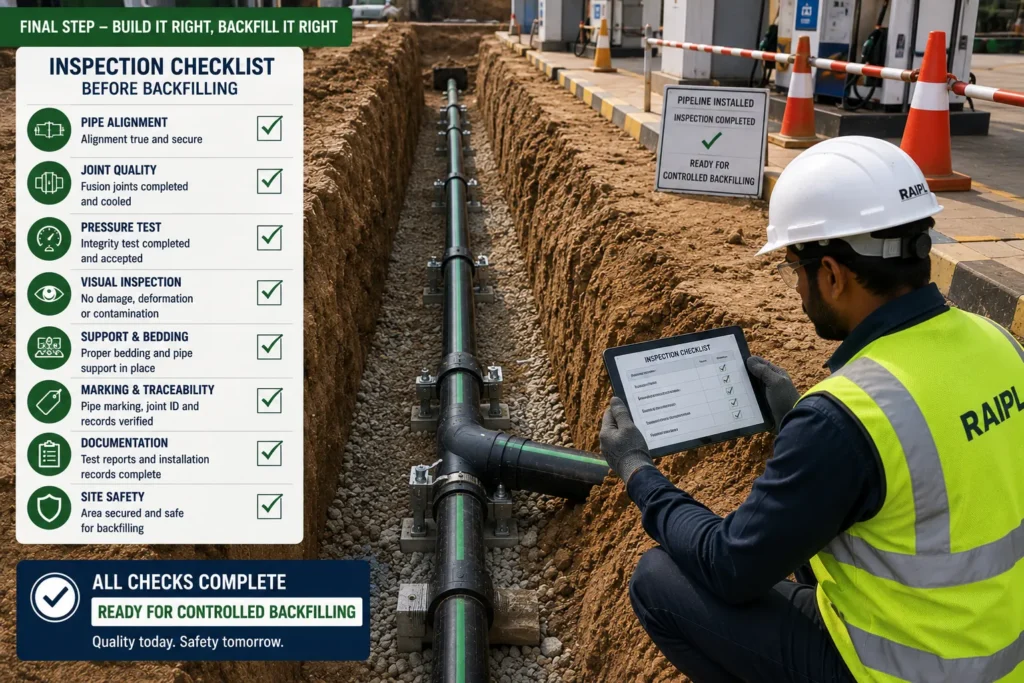
Only after the required installation checks and tests have been successfully completed should the system move toward final closure, subject to the project procedure.
Final acceptance can involve confirmation from the relevant:
- Contractor
- Consultant
- Petroleum company
- Inspection agency
- Project engineer
- Authority where applicable
The exact acceptance process depends on the specific project.
Field Testing vs Laboratory Certification Testing
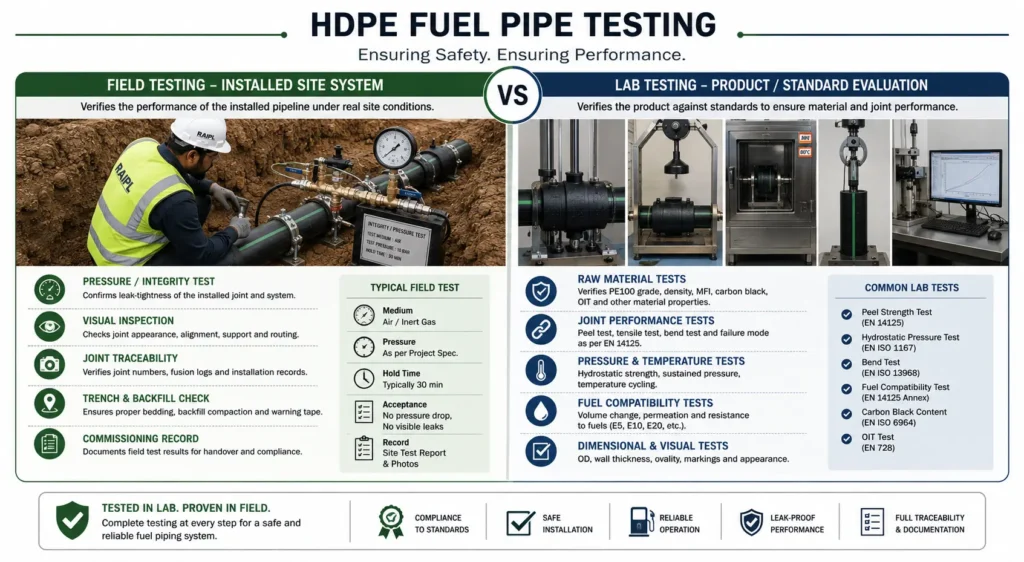
These two concepts should not be confused.
Field Testing
Field testing is carried out on the installed piping system at the project site.
Its purpose is to verify the integrity and quality of the actual installation.
Laboratory or Certification Testing
Laboratory testing evaluates the product or system against specific technical requirements and defined test methods.
This can include performance testing related to:
- Materials
- Mechanical behaviour
- Fuel exposure
- Pipe and fitting performance
- Other standard-specific requirements
A product passing laboratory testing does not eliminate the need for proper field installation and commissioning checks.
Similarly, a field pressure test does not replace formal product certification.
Both serve different purposes.
Why Factory Quality Control Matters
Before the pipe reaches the site, the manufacturer should already be controlling important production parameters.
Depending on the product and quality system, factory checks can involve:
- Dimensions
- Wall construction
- Surface condition
- Layer consistency
- Marking
- Raw material control
- Batch traceability
- Other specified tests
The aim is to ensure that the product leaving the factory matches the approved manufacturing specification.
Why Fitting Testing Matters
The pipe is only one component.
Fittings also need to perform as intended.
This can include evaluation of:
- Couplers
- Elbows
- Tees
- Transition components
- Other system-specific fittings
A complete fuel piping system depends on reliable pipe-to-fitting connections.
This is why technical evaluation should consider the system rather than only the straight pipe.
What Is the Role of EN 14125?
For underground thermoplastic and flexible metal pipework used at petrol filling stations, EN 14125 is an important European standard.
It provides requirements and test methods relevant to specialized fuel piping systems.
RAIPL’s multilayer HDPE fuel piping system has achieved EN 14125:2025 certification.
This helps demonstrate that the system has been evaluated against the requirements covered by the applicable certification scope.
However, product certification and site commissioning remain separate responsibilities.
A certified pipe still needs to be installed and tested correctly on site.
What Should a Buyer Ask for?
Before accepting a fuel piping installation, buyers and project teams should consider asking for:
- Product identification
- Applicable certification
- Technical data
- Compatible fitting details
- Installation instructions
- Fusion records where applicable
- Inspection records
- Commissioning test records
- Final acceptance documentation
The goal is not paperwork for the sake of paperwork.
The goal is traceability and confidence in the installed system.
Why Testing Is Especially Important Underground
Above-ground equipment is relatively easy to inspect and access.
Underground infrastructure is different.
Once the forecourt is completed, reaching the piping may require:
- Excavation
- Breaking finished surfaces
- Operational shutdown
- Additional labour
- Site disruption
That is why the testing stage is one of the most valuable opportunities in the entire installation process.
A problem identified while the trench is open is usually easier to address than the same problem discovered after commissioning.
RAIPL and Fuel Pipe Testing
RAIPL (Rahul Arts India Pvt. Ltd.) is developing a complete multilayer HDPE fuel piping system for underground petroleum applications.
Our approach includes not only manufacturing the pipe, but also focusing on:
- Compatible fittings
- Multilayer construction
- Technical documentation
- Quality control
- Testing
- Installation guidance
- System traceability
RAIPL’s objective is to support the complete lifecycle of the underground fuel piping system, from manufacturing through installation and commissioning.
Testing Should Build Confidence, Not Just Complete a Checklist
The purpose of testing is not simply to fill a form and move to the next construction activity.
The purpose is to confirm that the underground piping has been installed correctly before it becomes difficult to access.
A good commissioning process should answer:
Is the pipe correct?
Are the fittings correct?
Were the joints installed properly?
Does the system meet the required integrity criteria?
Is the documentation complete?
Only then should the underground network move toward final closure and operation.
Frequently Asked Questions
Should HDPE fuel pipe be tested before backfilling?
The inspections and tests required by the piping system, project specification and applicable regulations should be completed before final closure of the trench.
Is visual inspection enough?
No. Visual inspection is useful but does not replace any integrity, pressure, leak or commissioning test required by the approved procedure.
Can a certified fuel pipe skip site testing?
No. Product certification and field commissioning serve different purposes. A certified product still needs correct installation and the required site testing.
What is checked during a commissioning test?
Depending on the project, checks can include pipe routing, joint condition, pressure or integrity testing, leak verification, transitions and documentation.
Should test results be recorded?
Yes. Proper records improve traceability and provide evidence of the commissioning process.
Is higher test pressure always better?
No. The specified test pressure and procedure should be followed. Testing should not be improvised.
Test Before You Cover
The most important moment to verify an underground fuel piping system is while it is still visible.
Once the trench is closed, the opportunity becomes much more difficult.
That is why a disciplined process matters:
Inspect → Verify → Test → Record → Accept → Backfill
RAIPL believes that high-quality petroleum infrastructure requires both a properly engineered product and a properly verified installation.
Because what goes underground should go underground only after it has been checked properly.